
今回はRadioButtonコントロールの基本的な使用方法を理解していきましょう。
RadioButtonは複数の選択肢から1つの値を選択するためのコントロールです。
MainPage.xamlのGridをStackPanelに変更し、RadioButtonを3つ配置するXamlとそのときのデザイナ画面を以下に示します。
<Page
    x:Class="App1.MainPage"
    xmlns="http://schemas.microsoft.com/winfx/2006/xaml/presentation"
    xmlns:x="http://schemas.microsoft.com/winfx/2006/xaml"
    xmlns:local="using:App1"
    xmlns:d="http://schemas.microsoft.com/expression/blend/2008"
    xmlns:mc="http://schemas.openxmlformats.org/markup-compatibility/2006"
    mc:Ignorable="d">

    <StackPanel Background="{ThemeResource ApplicationPageBackgroundThemeBrush}">
        <RadioButton x:Name="radioButton1" Content="RadioButton" HorizontalAlignment="Stretch" VerticalAlignment="Stretch"/>
        <RadioButton x:Name="radioButton2" Content="RadioButton" HorizontalAlignment="Stretch" VerticalAlignment="Stretch"/>
        <RadioButton x:Name="radioButton3" Content="RadioButton" HorizontalAlignment="Stretch" VerticalAlignment="Stretch"/>
    </StackPanel>
</Page>
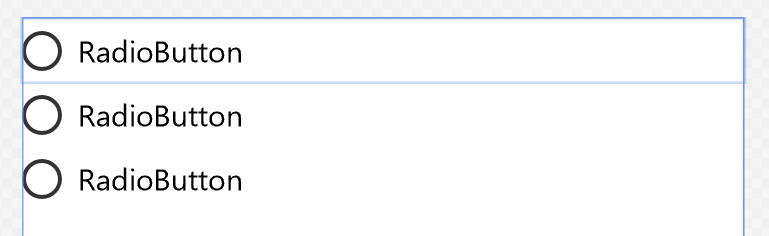
配置しただけでは1つもチェックされた状態のRadioButtonはありません。
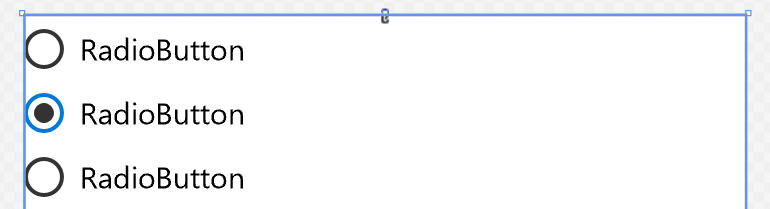
はじめからチェック状態にしたい場合は、IsCheckedプロパティにTrueを設定します。
ここでは2つめのRadioButtonをチェック状態にしてみましょう。
<RadioButton x:Name="radioButton2" Content="RadioButton"
             HorizontalAlignment="Stretch" VerticalAlignment="Stretch"
             IsChecked="True"/>
続いてチェック状態を取得するコードを見てみましょう。
チェック状態の取得もIsCheckedプロパティを使用します。
IsCheckedプロパティはbool?型なので、boolにキャストして変数に代入する場合はようにします。
bool checkedVal = (bool)radioButton1.IsChecked;
Please follow and like us:

コメント