
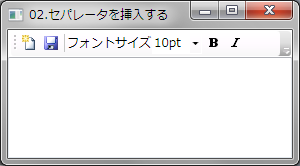
ツールバーにセパレーターを挿入するにはSeparatorクラスを使用します。
下記は[保存]ボタンと文字列「フォントサイズ」の間にセパレーターを挿入する例です。
XAMLの例
<DockPanel Name="DocPanel1">
    <ToolBar DockPanel.Dock="Top">
        <Button>
            <Image Source="Images/NewDocument.png" Width="16" Height="16" />
        </Button>
        <Button>
            <Image Source="Images/Save.png" Width="16" Height="16" />
        </Button>
        <!-- ★★★セパレーターを挿入★★★ -->
        <Separator />
        <TextBlock VerticalAlignment="Center">フォントサイズ</TextBlock>
        <ComboBox Width="50">
            <ComboBoxItem IsSelected="True">10pt</ComboBoxItem>
            <ComboBoxItem>11pt</ComboBoxItem>
            <ComboBoxItem>12pt</ComboBoxItem>
        </ComboBox>
        <Button>
            <Image Source="Images/boldhs.png" Width="16" Height="16" />
        </Button>
        <Button>
            <Image Source="Images/Italichs.png" Width="16" Height="16" />
        </Button>
    </ToolBar>
    <TextBox></TextBox>
</DockPanel>
VBの例
'XAMLではなくコードでツールバーを作成する場合は下記のようにします
Dim toolBar1 As New Controls.ToolBar    'ツールバー
Dim separator1 As New Separator         '★★★セパレータ★★★

'★★★セパレータをツールバーに追加★★★
toolBar1.Items.Add(separator1)
C#の例
// XAMLではなくコードでツールバーを作成する場合は下記のようにします
System.Windows.Controls.ToolBar toolBar1 =
    new System.Windows.Controls.ToolBar();
Separator separator1 = new Separator(); // ★★★セパレータ★★★

// ★★★セパレータをツールバーに追加★★★
toolBar1.Items.Add(separator1);