
ColorPicker の色を選択するスペクトラムは既定で矩形のものが表示されますが、この記事では円形のスペクトラムを表示する方法について説明します。
環境
| 開発環境 | Microsoft Visual Studio Professional 2019 Preview Version 16.11.0 Preview 3.0 |
| Framework | Microsoft .NET Framework Version 4.8.04084 |
| その他 | Microsoft.Project Reunion 0.8.0-preview |
| Microsoft.ProjectReunion.Foundation 0.8.0-preview | |
| Microsoft.ProjectReunion.WinUI 0.8.0-preview | |
| Microsoft.UI.Xaml 2.6.1 |
円形のスペクトラムを表示する
ColorPicker の色を選択する領域は、既定で矩形のものが表示されます。ここでは ColorSpectrumShape プロパティを使用して、円形のスペクトラムを表示する方法について説明します。
XAML による円形のスペクトラム表示
円形のスペクトラムを表示するには、ColorSpectrumShape プロパティに「Ring」を指定します。既定値は「Box」になっています。
以下に XAML での例を示します。
この例では、ColorPicker を2つ横に並べて表示しており、左側に「Box」、右側に「Ring」を指定しています。
<Window
    x:Class="Button.MainWindow"
    xmlns="http://schemas.microsoft.com/winfx/2006/xaml/presentation"
    xmlns:x="http://schemas.microsoft.com/winfx/2006/xaml"
    xmlns:local="using:Button"
    xmlns:d="http://schemas.microsoft.com/expression/blend/2008"
    xmlns:mc="http://schemas.openxmlformats.org/markup-compatibility/2006"
    xmlns:muxc="using:Microsoft.UI.Xaml.Controls"
    mc:Ignorable="d"
    >

    <StackPanel Orientation="Horizontal" HorizontalAlignment="Center" VerticalAlignment="Top">

        <ColorPicker x:Name="myColorPickerBox" ColorSpectrumShape="Box" Margin="10"/>
        <ColorPicker x:Name="myColorPickerRing" ColorSpectrumShape="Ring" Margin="10"/>

    </StackPanel>
</Window>
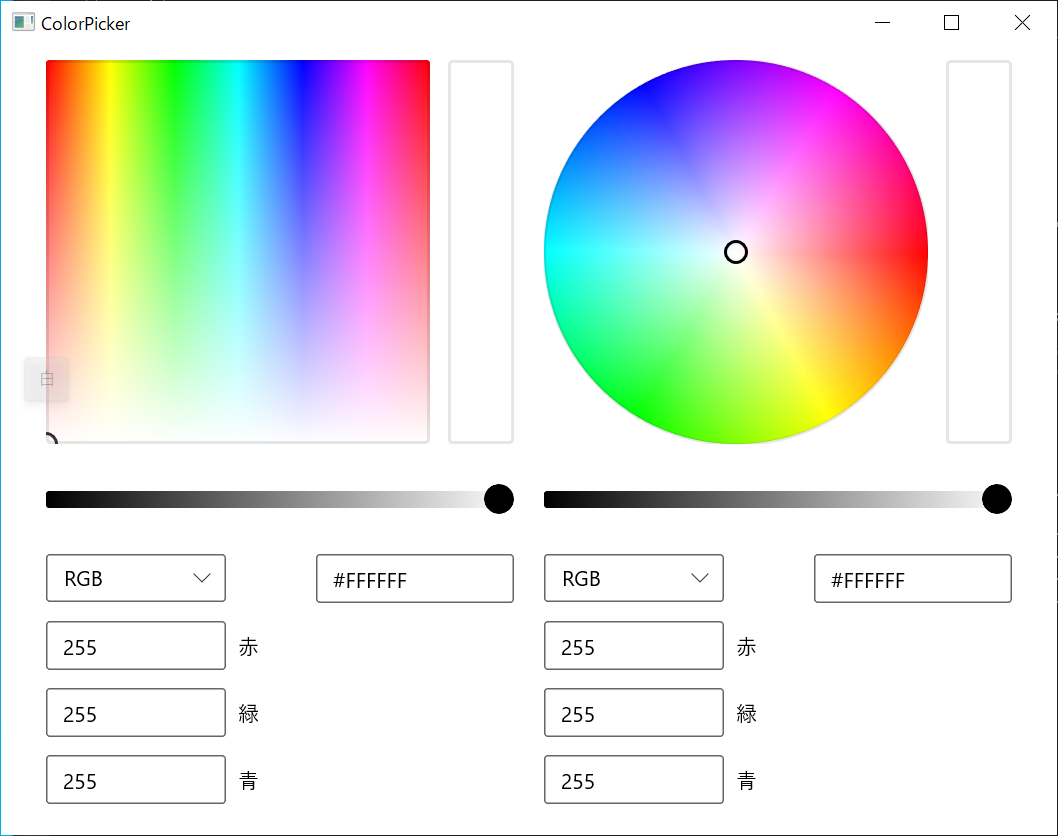
ColorSpectrumShape の使用例
コードで 円形のスペクトラムを表示する
以下にコードで円形のスペクトラムを表示する例を示します。
ColorSpectrumShape プロパティには、ColorSpectrumShape 列挙体の値「Ring」を指定します。「Box」を指定した場合は、既定の矩形になります。
public MainWindow()
{
    this.InitializeComponent();
    this.Title = "ColorPicker";

    myColorPicker.ColorSpectrumShape = ColorSpectrumShape.Ring;
}
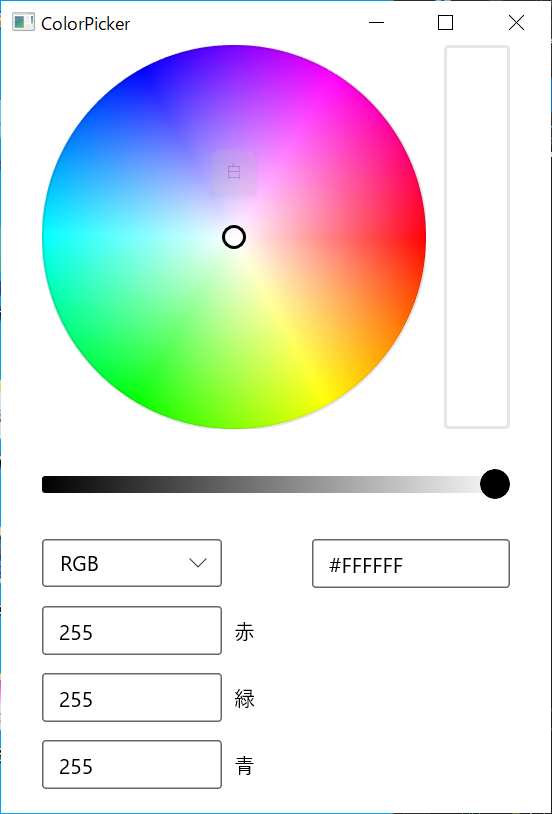
円形スペクトラムの表示例
WinUI 3 Tips一覧
Please follow and like us:
コメント