
本記事の概要
この記事では RadioButton にイメージを表示する方法について説明をします。
公式サイト情報はコチラを参照してください。
ラジオボタンにイメージを表示する例
イメージを表示する
プロジェクトへのイメージの追加
ラジオボタンに表示するイメージは外部リソースでも構いませんが、ここではプロジェクトに追加したイメージを利用する方法について説明します。
プロジェクトにイメージを追加するには、Resources¥Images フォルダに任意の画像を追加します。このフォルダーに追加したイメージは、ビルド アクションが自動的に MauiImage に設定されます。
以下は word.svg、excel.png、power_point.svg の3つの画像を追加した例です。dotnet_bot.svg という画像ファイルは、プロジェクト作成時から存在する画像です。
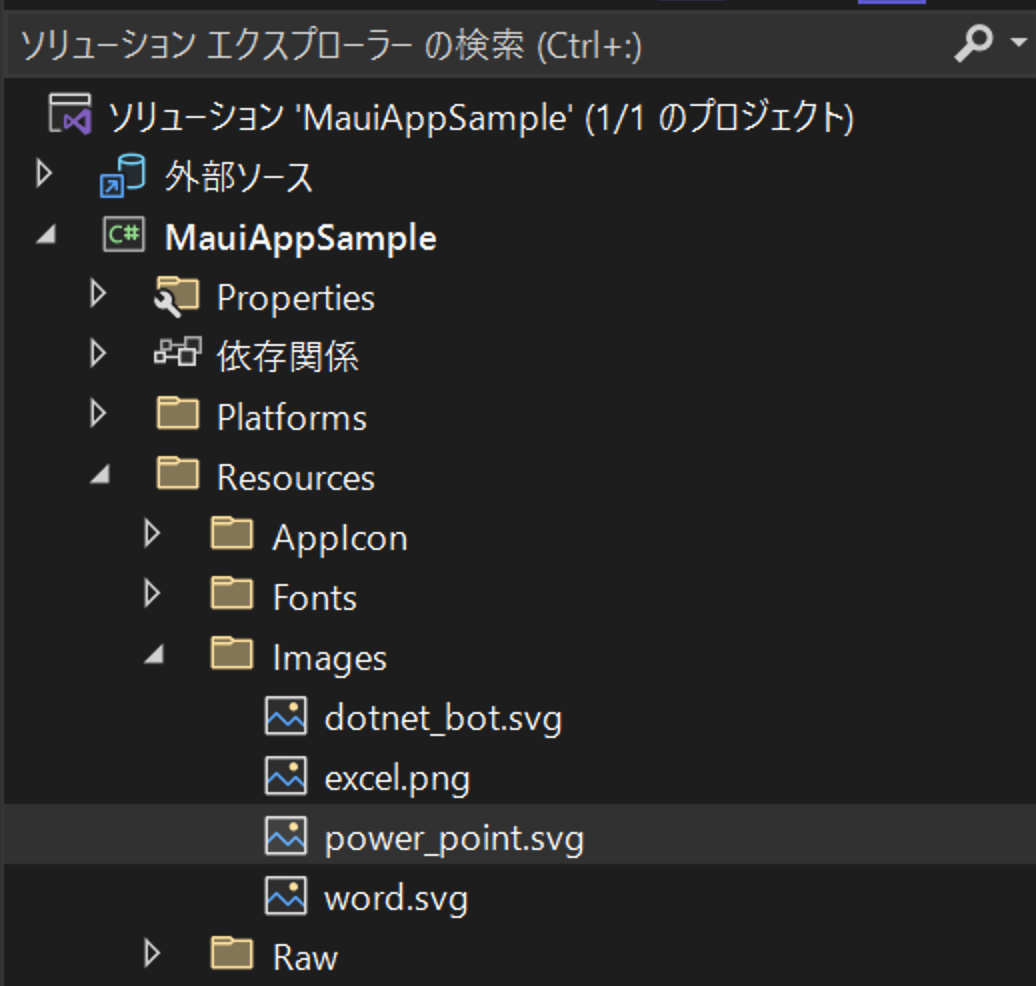
プロジェクトにイメージを追加する例
ここで注意しなければいけないのは、画像ファイル名は、すべて小文字にし、単語と単語をつなぐ場合はアンダースコア(_)を使用する必要があるということです。
先頭が大文字の画像ファイルですと、ビルド自体が失敗しますので注意してください。
png や jpg の他に スケーラブル ベクター グラフィックス (SVG) ファイルも使用することができます。
.NET MAUI は SVG ファイルを PNG ファイルに変換しますので、SVG ファイルを .NET MAUI アプリ プロジェクトに追加した場合は、XAML または C# から参照するときは .png にする必要があります。
ラジオボタンへのイメージ表示
RadioButton にイメージを表示するには、<RadioButton.Content> の中で <Image> を使用してイメージwp追加します。
<Image> の Source プロパティに指定するイメージは、Resource¥Image フォルダに追加したイメージのファイル名のみを記述すれば OK です。また、先述したように svg ファイルの場合は、拡張子を png にする必要があります。例えば Resource¥Images フォルダに word.svg というファイルを追加した場合は、word.png にします。
XAML の例
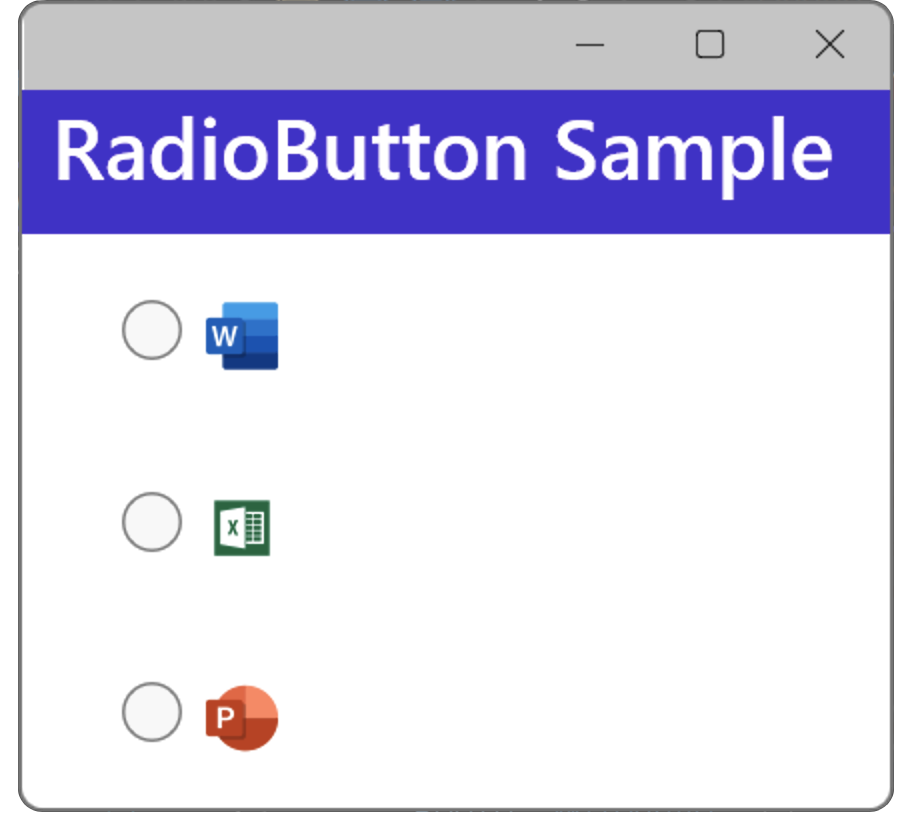
XAML で RadioButton に画像イメージを表示する例を以下に示します。
この例では3つの Button を配置しており、それぞれ Word、Excel、PowerPoint のアイコン画像を画像を表示しています。
Word 画像と PowerPoint 画像は拡張子が svg ですので png にして記述しています。
XAML の例
<?xml version="1.0" encoding="utf-8" ?>
<ContentPage xmlns="http://schemas.microsoft.com/dotnet/2021/maui"
             xmlns:x="http://schemas.microsoft.com/winfx/2009/xaml"
             x:Class="MauiAppSample.MainPage">

    <ScrollView>
        <VerticalStackLayout Spacing="25" Padding="30,0" VerticalOptions="CenterAndExpand">
            <RadioButton>
                <RadioButton.Content>
                    <Image Source="word.png" WidthRequest="24" HeightRequest="24" />
                </RadioButton.Content>
            </RadioButton>
            <RadioButton>
                <RadioButton.Content>
                    <Image Source="excel.png" WidthRequest="24" HeightRequest="24" />
                </RadioButton.Content>
            </RadioButton>
            <RadioButton>
                <RadioButton.Content>
                    <Image Source="power_point.png" WidthRequest="24" HeightRequest="24" />
                </RadioButton.Content>
            </RadioButton>

        </VerticalStackLayout>
    </ScrollView>

</ContentPage>
ラジオボタンにイメージを表示する例
RadioButton にテキストと画像の両方を表示する
先ほどの例では、画像のみを表示しました。
テキストと画像の両方を表示するには <RadioButton.Content> に <Image> と <Label> の両方を記述します。
先ほどの例にテキストも表示するようにした例を以下に示します。
<?xml version="1.0" encoding="utf-8" ?>
<ContentPage xmlns="http://schemas.microsoft.com/dotnet/2021/maui"
             xmlns:x="http://schemas.microsoft.com/winfx/2009/xaml"
             x:Class="MauiAppSample.MainPage">

    <ScrollView>
        <VerticalStackLayout Spacing="25" Padding="30,0" VerticalOptions="CenterAndExpand">
            <RadioButton>
                <RadioButton.Content>
                    <StackLayout Orientation="Horizontal">
                        <Image Source="word.png" WidthRequest="24" HeightRequest="24" />
                        <Label Text="Word" />
                    </StackLayout>
                </RadioButton.Content>
            </RadioButton>
            <RadioButton>
                <RadioButton.Content>
                    <StackLayout Orientation="Horizontal">
                        <Image Source="excel.png" WidthRequest="24" HeightRequest="24" />
                        <Label Text="Excel" />
                    </StackLayout>
                </RadioButton.Content>
            </RadioButton>
            <RadioButton>
                <RadioButton.Content>
                    <StackLayout Orientation="Horizontal">
                        <Image Source="power_point.png" WidthRequest="24" HeightRequest="24" />
                        <Label Text="PowerPoint" />
                    </StackLayout>
                </RadioButton.Content>
            </RadioButton>

        </VerticalStackLayout>
    </ScrollView>

</ContentPage>
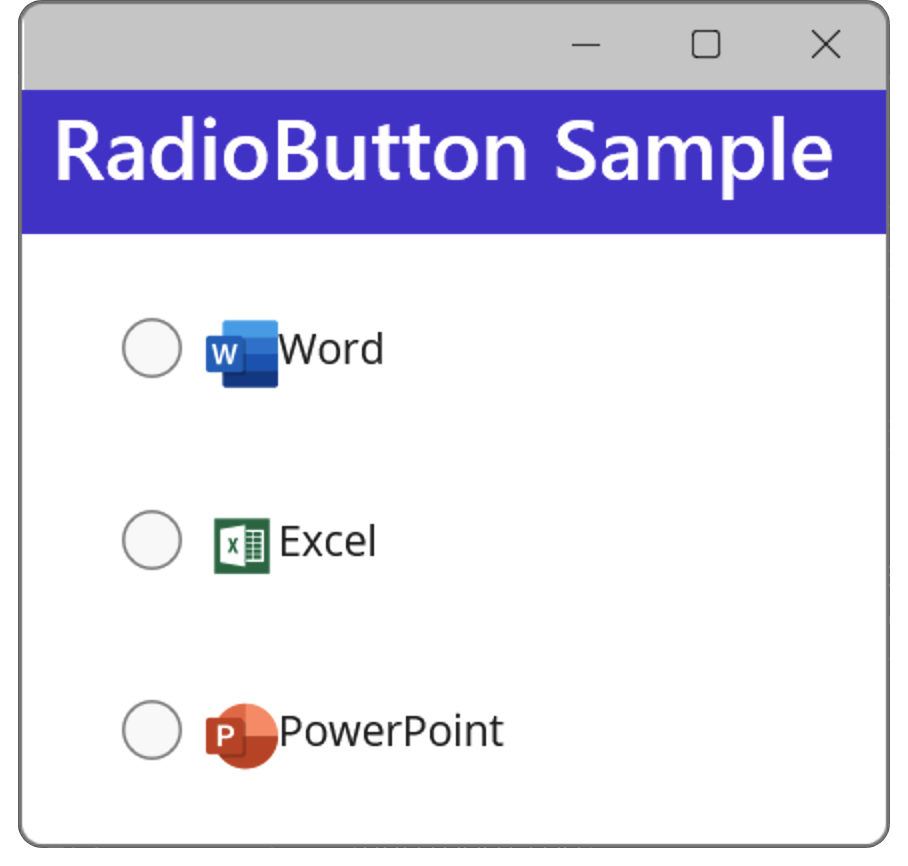
RadioButton に画像とテキストを表示する例
.NET MAUI Tips
本サイトでまとめている .NET MAUI Tips の一覧はこちらから確認できます。

コメント